How to Make Perfect Rice Krispie Treats
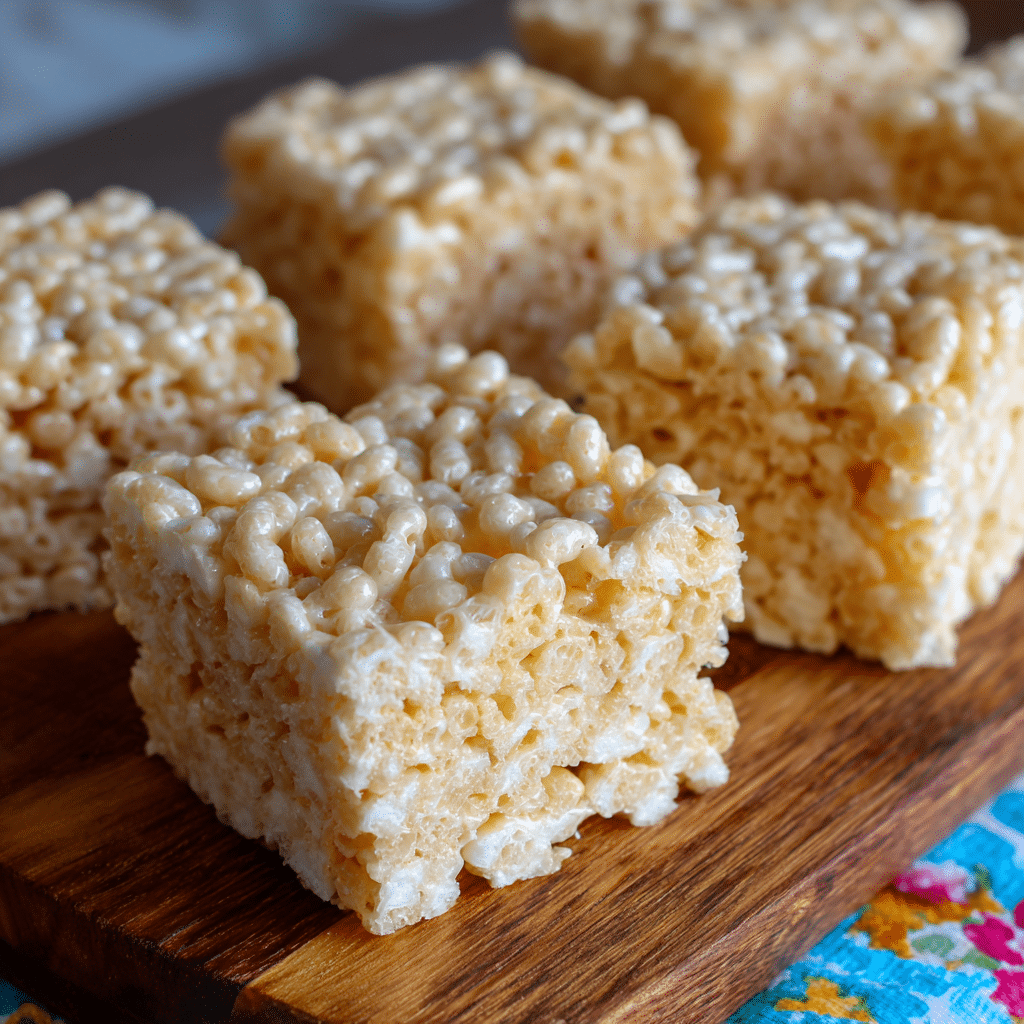
If you’ve ever wanted a quick, irresistible snack that brings back childhood memories and satisfies every craving, look no further than Rice Krispie Treats! These gooey, crispy, and delicious homemade delights blend simple ingredients with a fun technique for a perfect, melt-in-your-mouth experience. Whether it’s your first time or you’re honing your recipe, learning how to make perfect Rice Krispie Treats is a little kitchen joy everyone can master with ease.
Why You’ll Love This Recipe
- Quick and easy to make: You only need about 10 minutes to whip up these tasty treats, perfect for last-minute snacks or parties.
- Minimal ingredients required: Just a handful of pantry staples come together for maximum flavor and texture.
- Customizable to your taste: From gooey marshmallows to crunchy cereal, you can easily add your personal touch.
- Deliciously nostalgic: The classic combination reminds you of childhood comfort every bite.
- Kid-friendly fun: Great for involving kids in the kitchen, boosting smiles and creativity.
Ingredients You’ll Need
This recipe keeps things delightfully simple, but each ingredient plays a crucial role in creating the perfect balance of crispiness and chewiness in your Rice Krispie Treats.
- Rice Krispies cereal: The main star providing the crispy texture that’s essential to this treat.
- Marshmallows: Melted gooey marshmallows act as the sweet binder that holds everything together.
- Butter: Adds rich flavor and helps create the silky marshmallow mixture for easy combining.
- Vanilla extract (optional): A splash enhances the overall flavor and adds warmth.
- Non-stick spray or butter for the pan: Ensures your treats come out cleanly without sticking.
Variations for Rice Krispie Treats
Feel like switching things up? Rice Krispie Treats are incredibly versatile—easy to adapt for different tastes, occasions, and dietary needs. Let your creativity flow with these tasty variations.
- Chocolate lover’s twist: Mix in some chocolate chips or drizzle melted chocolate on top for a rich upgrade.
- Nut butter addition: Stir in peanut butter or almond butter for a nutty depth and creaminess.
- Fruity fun: Add dried fruit like cranberries or mini M&Ms for a colorful burst of flavor and texture.
- Gluten-free version: Use gluten-free crisp rice cereal to accommodate dietary restrictions without losing crispiness.
- Double marshmallow softness: Use half marshmallow cream mixed with whole marshmallows for an ultra-soft version.

How to Make Rice Krispie Treats
Step 1: Prepare Your Pan
Start by greasing a 9×13-inch baking pan with butter or non-stick spray. This keeps your treats from sticking and helps you achieve clean edges for easy cutting.
Step 2: Melt Butter and Marshmallows
In a large pot over low heat, melt 3 tablespoons of butter. Once melted, add 10 ounces of marshmallows and stir continuously until completely smooth and gooey. Remove from heat and stir in 1 teaspoon of vanilla extract if you like.
Step 3: Combine with Rice Krispies
Pour 6 cups of Rice Krispies cereal into the melted marshmallow mixture. Using a spatula, fold gently until the cereal is well coated, making sure not to crush the cereal for maximum crunch.
Step 4: Press Into Pan
Transfer the mixture into your prepared pan. With a buttered spatula or parchment paper, press the mixture evenly but gently—avoid pressing too hard as this can make the treats too dense.
Step 5: Let Cool and Cut
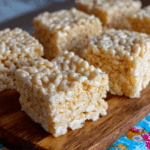
Allow the treats to cool for at least 30 minutes at room temperature. Once set, cut into squares and enjoy your homemade, perfectly chewy Rice Krispie Treats!
Pro Tips for Making Rice Krispie Treats
- Use fresh marshmallows: Fresh marshmallows melt better and create a smoother, gooier texture.
- Low and slow heating: Melt your butter and marshmallows on low heat to prevent scorching and graininess.
- Don’t overmix: Fold gently to keep the cereal intact and maintain that classic crunch.
- Butter your hands: When pressing the mixture into the pan or shaping by hand, butter your hands to avoid sticking.
- Avoid fridge chilling: Don’t refrigerate the treats immediately; letting them set at room temperature gives the best texture.
How to Serve Rice Krispie Treats
Garnishes
Add a sprinkle of colored sugar, mini chocolate chips, or rainbow sprinkles right after pressing the mixture into the pan for fun, festive toppings that elevate the look and flavor.
Side Dishes
Serve your Rice Krispie Treats alongside a cold glass of milk, hot chocolate, or even a fresh fruit salad for a fun, balanced snack that satisfies both sweet and fresh cravings.
Creative Ways to Present
Cut your treats into fun shapes using cookie cutters for party themes or layer with frosting, peanut butter, or Nutella spreads in between for Rice Krispie treat sandwiches. The options are endless and exciting!
Make Ahead and Storage
Storing Leftovers
Store Rice Krispie Treats in an airtight container at room temperature for up to three days to keep them chewy and fresh.
Freezing
Wrap individual treats tightly in plastic wrap and place them in a freezer bag to freeze for up to six weeks; thaw at room temperature before serving.
Reheating
If your treats have firmed up too much, microwave them for a few seconds to soften the marshmallow and regain that gooey texture.
FAQs
Can I use a different cereal instead of Rice Krispies?
Absolutely! While Rice Krispies offer a classic crunch, you can try similar puffed rice cereals or gluten-free alternatives for a variation in flavor and texture.
How do I prevent my Rice Krispie Treats from being too hard?
Be gentle when pressing the mixture into the pan and avoid overcooking the marshmallows. Also, avoid refrigeration during setting, as cold can harden the treats.
Can I add mix-ins like chocolate chips or nuts?
Yes! Mix-ins can be added after melting the marshmallows but before combining with the cereal. Just fold them in carefully to keep the texture balanced.
Is there a vegan version of Rice Krispie Treats?
Yes, using vegan marshmallows and plant-based butter allows you to make delicious vegan-friendly Rice Krispie Treats with similar gooeyness.
How long do homemade Rice Krispie Treats last?
Stored properly in an airtight container, they stay fresh at room temperature for about three days and can be frozen for extended freshness.
Final Thoughts
Rice Krispie Treats are a timeless, comforting snack that adds a little sweetness to any day. Once you master this straightforward recipe, you’ll find yourself making them over and over, whether for a quick treat, a festive gathering, or sharing smiles with your loved ones. So grab your butter and marshmallows and get ready for a crunchy, gooey delight that never goes out of style!
Related Posts
- Why Strawberry Jello Poke Cake Is a Must-Try Dessert
- How to Make Italian Affogato at Home
- Irresistible Chocolate Strawberry Yogurt Clusters Recipe
Rice Krispie Treats
Rice Krispie Treats are quick, easy, and nostalgic snacks combining crispy Rice Krispies cereal with gooey melted marshmallows and butter, resulting in a perfect chewy and crunchy delight. This versatile recipe can be customized with various mix-ins and is great for kids and all ages alike.
- Prep Time: 5 minutes
- Cook Time: 5 minutes
- Total Time: 10 minutes plus 30 minutes cooling
- Yield: 12 servings 1x
- Category: Appetizers
- Method: Baking
- Cuisine: American
- Diet: Gluten Free
Ingredients
Main Ingredients
- 6 cups Rice Krispies cereal
- 10 ounces marshmallows
- 3 tablespoons butter
- 1 teaspoon vanilla extract (optional)
- Non-stick spray or butter for the pan
Instructions
- Prepare Your Pan: Start by greasing a 9×13-inch baking pan with butter or non-stick spray. This keeps your treats from sticking and helps you achieve clean edges for easy cutting.
- Melt Butter and Marshmallows: In a large pot over low heat, melt 3 tablespoons of butter. Once melted, add 10 ounces of marshmallows and stir continuously until completely smooth and gooey. Remove from heat and stir in 1 teaspoon of vanilla extract if you like.
- Combine with Rice Krispies: Pour 6 cups of Rice Krispies cereal into the melted marshmallow mixture. Using a spatula, fold gently until the cereal is well coated, making sure not to crush the cereal for maximum crunch.
- Press Into Pan: Transfer the mixture into your prepared pan. With a buttered spatula or parchment paper, press the mixture evenly but gently—avoid pressing too hard as this can make the treats too dense.
- Let Cool and Cut: Allow the treats to cool for at least 30 minutes at room temperature. Once set, cut into squares and enjoy your homemade, perfectly chewy Rice Krispie Treats!
Notes
- Use fresh marshmallows for better melting and smoother texture.
- Melt butter and marshmallows on low heat to prevent scorching and graininess.
- Fold the mixture gently to keep the cereal intact and preserve its crunch.
- Butter your hands when pressing the mixture into the pan or shaping it by hand to avoid sticking.
- Allow treats to set at room temperature and avoid refrigeration for best texture.
Nutrition
- Serving Size: 1 square (about 2x2 inches)
- Calories: 150
- Sugar: 15g
- Sodium: 95mg
- Fat: 4g
- Saturated Fat: 2.5g
- Unsaturated Fat: 1.5g
- Trans Fat: 0g
- Carbohydrates: 27g
- Fiber: 0g
- Protein: 1g
- Cholesterol: 10mg
Keywords: Rice Krispie Treats, marshmallow treats, easy snack, gluten free dessert, childhood snack, no bake dessert, quick treat