Irresistible Chocolate Buttermilk Waffles Recipe
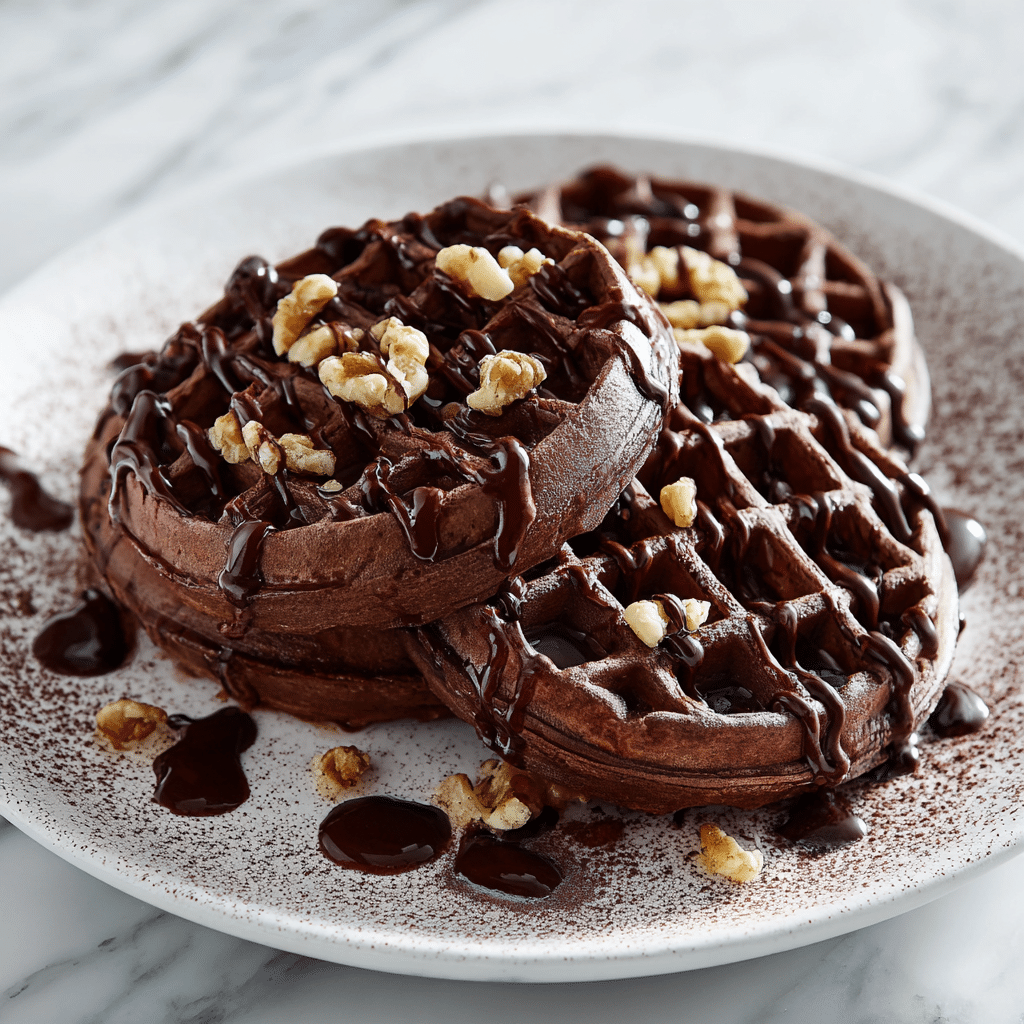
If you’re craving a breakfast that combines fluffy texture with rich chocolatey flavor, this Chocolate Buttermilk Waffles recipe is exactly what you need. These waffles are perfectly tender on the inside, crisp on the outside, and carry the delightful tang of buttermilk balanced by deep cocoa notes. Whether you’re planning a weekend brunch or a special treat to start your day, this recipe brings the ultimate sweet breakfast experience right to your table.
Why You’ll Love This Recipe
- Fluffy and Light Texture: Thanks to the buttermilk and proper mixing technique, these waffles stay airy and soft inside.
- Rich Chocolate Flavor: The addition of cocoa powder delivers a deep, indulgent chocolate taste without overpowering.
- Easy to Customize: From adding nuts to swapping dairy, this basic recipe is very adaptable to your preferences.
- Perfect Crisp Edges: Achieved by the correct batter consistency and waffle iron temperature, offering a delightful crunch.
- Great for Any Occasion: Whether it’s breakfast, brunch, or dessert, these waffles fit seamlessly into your menu.
Ingredients You’ll Need
Each ingredient in this Chocolate Buttermilk Waffles recipe plays a crucial role in achieving that perfect balance between richness, fluffiness, and a hint of tang. You’ll find that these simple staples work together to create a mouthwatering batter that cooks evenly into golden brown goodness.
- All-purpose Flour: The base for structure, providing the right density for tender but firm waffles.
- Cocoa Powder: Unsweetened cocoa adds the essential chocolate depth and dark color.
- Sugar: Just enough sweetness to highlight the chocolate without making it overly sweet.
- Baking Powder & Baking Soda: Both leavening agents work together to give lift and lightness.
- Salt: Enhances flavor by balancing sweetness and intensifying chocolate notes.
- Buttermilk: Adds moisture and a slight tang, reacting with baking soda for extra fluffiness.
- Eggs: Provide structure and richness, binding all ingredients together.
- Melted Butter: Adds fat for moistness and a silky, luxurious texture.
- Vanilla Extract: Boosts the depth of overall flavor with warm aromatic notes.
Variations for Chocolate Buttermilk Waffles
Feel free to tweak this Chocolate Buttermilk Waffles recipe to suit your mood or dietary needs. Each variation maintains the core deliciousness while adding a new twist, making it fun and easy to personalize your waffle experience.
- Nutty Delight: Fold in chopped walnuts or pecans for a crunchy texture boost.
- Vegan-Friendly: Substitute eggs with flax eggs and use plant-based buttermilk alternatives.
- Mocha Flavor: Add a teaspoon of instant coffee powder to the batter for a caffeinated chocolate kick.
- Berry Burst: Toss in fresh or frozen raspberries or blueberries for fruity contrast.
- Spiced Chocolate: Mix in cinnamon or chili powder for a warm, intriguing flavor profile.

How to Make Chocolate Buttermilk Waffles
Step 1: Prepare the Dry Ingredients
In a large bowl, combine all-purpose flour, cocoa powder, sugar, baking powder, baking soda, and salt. Whisk them together thoroughly to ensure even distribution of leavening agents and cocoa for a consistent batter.
Step 2: Mix the Wet Ingredients
In another bowl, whisk the buttermilk, eggs, melted butter, and vanilla extract until everything is well blended and smooth. This liquid mixture gives the waffles moisture and richness.
Step 3: Combine Wet and Dry Ingredients
Pour the wet ingredients into the dry, gently folding them together until just combined. Avoid overmixing to keep the batter light. Some small lumps are okay—overwork will make the waffles tough.
Step 4: Preheat and Grease Your Waffle Iron
Turn on your waffle iron and lightly grease it with butter or a non-stick spray. Hot and well-greased irons ensure crisp edges and prevent sticking.
Step 5: Cook the Waffles
Spoon the batter onto the hot waffle iron (amount depends on your iron size) and close the lid. Cook until steam decreases and the waffle is dark brown on both sides. Typically, it takes about 4-5 minutes.
Step 6: Serve Immediately or Keep Warm
Remove waffles carefully and serve hot. To keep multiple waffles warm, place them in a single layer on a baking sheet in a 200°F oven until ready.
Pro Tips for Making Chocolate Buttermilk Waffles
- Measure Accurately: Precise measurements of cocoa and flour prevent dryness or heaviness in your waffles.
- Use Fresh Leavening: Baking powder and soda lose effectiveness over time, so fresh ingredients guarantee fluffiness.
- Don’t Overmix: Stir batter just until wet and dry ingredients are combined to avoid chewy waffles.
- Let Batter Rest: Allowing the batter to sit for 5-10 minutes can help hydrates the flour, making waffles tender.
- Keep Iron Hot: Preheating the waffle iron thoroughly ensures perfect browning and prevents sticking.
How to Serve Chocolate Buttermilk Waffles
Garnishes
Sweeten your waffles with a dusting of powdered sugar, a drizzle of maple syrup, or dollops of whipped cream. Fresh strawberries, sliced bananas, or a handful of chocolate chips also make great toppings.
Side Dishes
Pair these waffles with classic breakfast sides such as crispy bacon, scrambled eggs, or fresh fruit salad. For a brunch spread, add yogurt parfaits or smoked salmon for a savory balance.
Creative Ways to Present
Stack multiple waffles to create a tower topped with berries and syrup, or cut them into smaller squares for waffle sliders filled with nut butter or ice cream for dessert.
Make Ahead and Storage
Storing Leftovers
Place leftover Chocolate Buttermilk Waffles in an airtight container or resealable bag and keep them in the refrigerator for up to 3 days without losing their texture.
Freezing
Freeze cooked waffles by laying them flat on a baking sheet until firm, then transfer to freezer bags. They freeze well for up to 2 months and are perfect for quick breakfasts.
Reheating
To reheat, toast waffles in a toaster or warm them in a preheated oven at 350°F for about 5-8 minutes. This restores their crispiness and warmth beautifully.
FAQs
Can I use regular milk instead of buttermilk?
Yes, but to mimic buttermilk’s acidity, add a tablespoon of lemon juice or vinegar per cup of milk and let it sit for 5 minutes before using.
How do I make these waffles gluten-free?
Use a gluten-free all-purpose flour blend that includes xanthan gum or guar gum for structure, and follow the recipe as usual for best results.
Can I prepare the batter the night before?
It’s best to mix the batter fresh, but you can prepare the dry ingredients ahead and combine with wet ingredients just before cooking for convenience.
Why are my waffles soggy after cooking?
This often happens if the waffle iron isn’t hot enough or the batter is too wet; try increasing heat and slightly reduce buttermilk in the recipe.
What’s the best way to get crispy edges?
Ensure the waffle iron is properly preheated and avoid covering cooked waffles, which traps steam and softens edges.
Final Thoughts
Chocolate Buttermilk Waffles are an absolute game-changer when it comes to breakfast and brunch. They bring together the perfect mix of light, fluffy texture and indulgent chocolate flavor that feels like a warm hug on a plate. I encourage you to try this recipe soon—it’s simple, rewarding, and sure to become a new favorite in your kitchen.
Related Posts
- How to Make Creamy Milk Toast Fast
- Why Avocado Toast Is the Perfect Breakfast
- Why Apple Cinnamon Roll Bake Is Perfect Breakfast
Chocolate Buttermilk Waffles

Chocolate Buttermilk Waffles combine a fluffy, light texture with rich chocolate flavor and a subtle tang from buttermilk, creating tender, crisp-on-the-outside waffles perfect for breakfast, brunch, or dessert.
- Prep Time: 10 minutes
- Cook Time: 15 minutes
- Total Time: 25 minutes
- Yield: 6-8 waffles 1x
- Category: Breakfast
- Method: Waffle Iron Cooking
- Cuisine: American
- Diet: Vegetarian
Ingredients
Dry Ingredients
- 1 ¾ cups all-purpose flour
- ¼ cup unsweetened cocoa powder
- ¼ cup sugar
- 1 teaspoon baking powder
- ½ teaspoon baking soda
- ¼ teaspoon salt
Wet Ingredients
- 1 ½ cups buttermilk
- 2 large eggs
- ¼ cup melted butter
- 1 teaspoon vanilla extract
Instructions
- Prepare the Dry Ingredients: In a large bowl, combine the all-purpose flour, cocoa powder, sugar, baking powder, baking soda, and salt. Whisk thoroughly to ensure even distribution of leavening agents and cocoa, resulting in a consistent batter.
- Mix the Wet Ingredients: In another bowl, whisk together the buttermilk, eggs, melted butter, and vanilla extract until smooth and well blended, providing moisture and richness to the waffles.
- Combine Wet and Dry Ingredients: Pour the wet ingredients into the dry, gently folding them together until just combined. Avoid overmixing; some small lumps are okay to keep the batter light and prevent tough waffles.
- Preheat and Grease Your Waffle Iron: Turn on your waffle iron and lightly grease it with butter or non-stick spray. A hot, well-greased iron ensures crisp edges and prevents sticking.
- Cook the Waffles: Spoon an appropriate amount of batter onto the waffle iron and close the lid. Cook until the steam subsides and the waffle is dark brown on both sides, about 4 to 5 minutes depending on your iron.
- Serve Immediately or Keep Warm: Remove waffles carefully and serve hot. To keep multiple waffles warm, place them in a single layer on a baking sheet in a 200°F oven until ready to serve.
Notes
- Measure ingredients accurately to prevent dry or heavy waffles.
- Use fresh baking powder and soda for optimal fluffiness.
- Do not overmix the batter to avoid chewy texture.
- Allow the batter to rest 5-10 minutes to hydrate the flour and create tender waffles.
- Keep the waffle iron hot for perfect browning and crisp edges.
Nutrition
- Serving Size: 1 waffle
- Calories: 250
- Sugar: 8g
- Sodium: 300mg
- Fat: 12g
- Saturated Fat: 7g
- Unsaturated Fat: 4g
- Trans Fat: 0g
- Carbohydrates: 30g
- Fiber: 3g
- Protein: 6g
- Cholesterol: 70mg
Keywords: chocolate waffles, buttermilk waffles, breakfast waffles, fluffy waffles, chocolate breakfast recipe